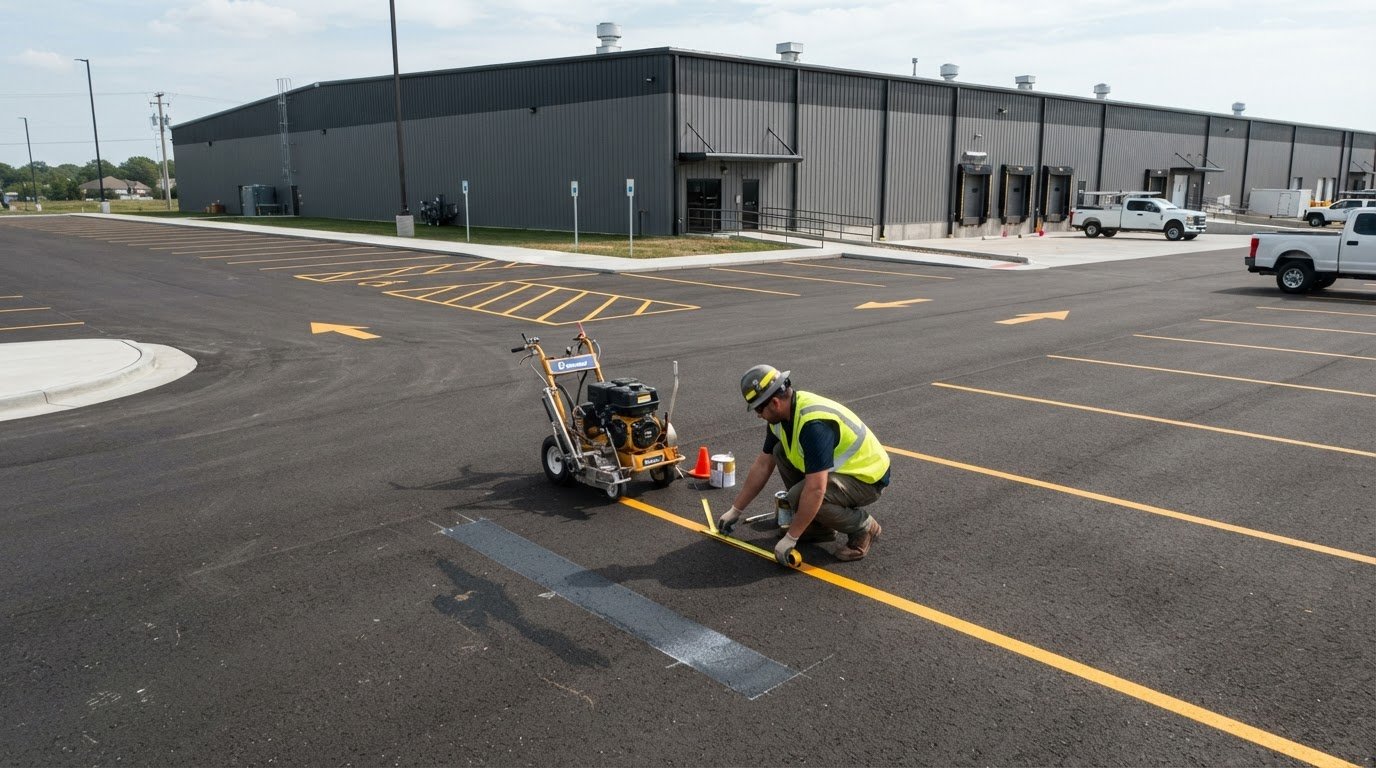
A freshly painted line can still be misplaced, uneven, or too quick to fade. Common striping application errors usually come from inaccurate layout measurements, a dirty or damp surface, or applying the wrong material in unsuitable conditions. Correct them by removing or covering misplaced markings, preparing the surface, measuring the layout carefully, and matching the striping method to the pavement, climate, and traffic.
It’s frustrating to spot a layout problem after the paint dries, especially when markings guide vehicles and pedestrians through a busy lot or facility. Careful planning and surface preparation help prevent avoidable rework and keep lines clear and functional.
This guide covers how to correct misplaced lines, clean and prepare surfaces, measure layouts, and account for weather and traffic. It also explains when old markings need removal instead of a simple cover-up, so the next application starts with a sound base.
Key Takeaways
- Assess misplaced markings before correcting them; the removal or cover-up method affects both the pavement and the finished appearance.
- Clean the surface and repair minor defects before applying new lines to support better adhesion and durability.
- Measure the layout and accessible spaces before painting, then align markings and stencils with applicable requirements.
- Choose striping materials and application conditions with the pavement, local weather, and traffic patterns in mind.
1. Correcting improperly placed parking-lot lines
A misplaced stripe can send vehicles into the wrong aisle, narrow a turning path, or make parking less predictable. Before correcting it, compare the painted layout with intended traffic flow, accessible spaces, fire lanes, and applicable local requirements. Even a line that looks slightly off can confuse drivers where parking stalls meet a travel lane.
Markings, space dimensions, colors, symbols, or signs that fail to meet applicable rules can violate ADA, fire-lane, or local code requirements. Accessible parking markings must follow accessibility requirements, while fire-lane layouts and other site details depend on applicable local codes.
Correct the old mark before painting its replacement. Removal methods depend on the pavement and existing material. Options include scraping, water blasting at a pressure that won’t damage the pavement, or covering the stripe with blackout paint. Pressure washing can damage asphalt, so aggressive cleaning isn’t automatically better. Blackout paint may hide an incorrect line, but it can leave a messy finish, especially where drivers need clear visual guidance.
Use this sequence to limit confusion and rework:
- Mark the intended line with a guide or layout marks, then check its alignment against adjacent stalls and drive aisles.
- Assess the old stripe and pavement. Choose scraping, careful water blasting, or blackout paint based on the surface and appearance needed.
- Apply the replacement line only after the correction area is ready, then keep vehicles away until the new marking is ready for traffic.
Paint thickness affects coverage and wear. Too little can leave a faint, uneven stripe that loses visibility sooner; too much can create a raised, slow-drying layer or an inconsistent edge. Apply a controlled coat suited to the paint and equipment instead of trying to correct poor coverage with an excessively heavy pass.
Uneven or oversprayed lines often result from a dirty or worn spray tip, incorrect gun alignment, inconsistent walking speed, or a poorly set spray pattern. Low-quality equipment can also produce uneven lines and poor adhesion. Check the tip, gun position, and pattern on a test area before continuing. Set spray pressure according to the equipment and paint instructions: pressure that’s too high can spread paint beyond the intended edge.
Clear, accurately placed parking lot striping helps separate stalls from travel lanes and supports safer circulation. For a planned layout or corrected markings, parking lot line striping should preserve usable turning space and make each route easy to read.
2. Surface cleaning and preparation
Paint bonds to pavement, not to dirt, oil, loose aggregate, or standing water. On parking lots, these contaminants can cause smearing, flaking, uneven fading, and early deterioration. A stripe may look clean from a vehicle while residue remains where tires drip oil or runoff collects. Inspect the entire application area before striping, including stall edges and drive lanes.
First, remove loose debris and old material from the planned line path. Sweep away leaves, grit, and dust, then inspect for oil spots, peeling paint, and damaged asphalt. Scraping or grinding can remove old markings; grinding or sandblasting can help with thick thermoplastic layers. Choose a method suited to the pavement and existing marking. Pressure washing may remove lines, but it can also damage asphalt.
Oil and moisture require separate attention. Oil under fresh paint can interfere with adhesion, while damp pavement can prevent a reliable bond. Clean contaminated areas, then let the surface dry before applying paint. Don’t assume the pavement is dry just because puddles have disappeared. Check shaded areas, low points, and cracks where water can linger after rain or washing.
Fresh asphalt also needs material consideration. Oil-based paint can discolor when its solvents mix with tar on newly paved asphalt, while water-based paint may not adhere for long. On fresh pavement, plan a second coat about 30 days after the first. That timing helps address the initial application without assuming one coat will provide lasting visibility.
Use a practical preparation sequence before the first pass:
- Clear loose dirt and debris from the entire marking area.
- Remove oil and old, loose striping that could affect the new line.
- Repair minor surface defects, then allow cleaning water to dry.
- Inspect the pavement again for residue, moisture, and unstable asphalt.
Preparation also means checking the pavement’s overall condition. New lines won’t stabilize loose or crumbling asphalt, so repair unstable areas before applying markings. If sealcoating is planned, complete it before striping. Repaint affected sections promptly after pavement repairs so drivers aren’t left following incomplete lines.
Surface mistakes can shorten the life of markings even when the layout and equipment are right. Follow the paint manufacturer’s application instructions and applicable site regulations, especially where markings guide accessible parking or traffic routes. For parking lot painting, use this sequence: clean, repair, dry, inspect, then apply. Skipping drying or leaving oil behind can cause flaking or uneven lines.

3. Layout planning and space measurements
Measure the parking lot before applying paint, not while the striping machine is moving. Start with a site plan, then compare it with pavement edges, entrances, columns, loading areas, and existing travel lanes. A layout that overlooks a fixed obstacle can reduce usable space or force awkward turns. Temporarily mark proposed stall lines and walk the routes from each entrance before committing to paint.
Before marking the lot, check applicable state and local regulations for parking-space widths and required accessible spaces. Property owners should approve the layout before striping begins. This gives the crew and owner a shared reference for stall placement, accessible markings, fire lanes, and directional arrows. Keep the approved plan on site so measurements can be checked during layout and maintenance.
Measure every stall from the same reference edge. If one line shifts, the error can carry through a whole row, leaving the last stall uneven or narrowing the drive aisle. Before applying paint, recheck the first, middle, and last spaces against the plan. Consider how parked vehicles will relate to nearby turns, pedestrian paths, and loading access. Precise spacing supports traffic flow and keeps markings readable.
Accessible parking needs careful measurement and clear placement. According to the U.S. Department of Justice, accessible parking access aisles must be at least 60 inches wide. Mark the aisle beside its associated space, keep it distinguishable from the parking stall, and preserve a clear route toward the entrance. Confirm the required accessible-space count and placement against applicable regulations before painting symbols or stencils.
- Identify entrances, exits, pedestrian routes, loading zones, and fixed obstacles on the site plan.
- Measure proposed stalls and drive aisles from consistent reference points.
- Compare accessible spaces and access aisles with applicable requirements, including the 60-inch minimum aisle width.
- Mark the layout temporarily, then walk vehicle and pedestrian paths to spot conflicts.
- Get the owner’s approval before applying paint, and retain the final plan for future maintenance.
Stencils and symbols need the same careful planning as straight lines. Place each marking where drivers can see it without blocking a turning path or confusing a neighboring stall. Check the stencil’s orientation from the approaching traffic’s viewpoint. A backward symbol or one hidden near an obstacle can undermine visibility even when stall lines are precisely measured.
Plan for future maintenance while the layout is still on paper. Record dimensions, accessible-space locations, arrows, and section markings so repairs can restore the original pattern. After pavement repairs, use those records to reconnect interrupted lines. A consistent plan makes touch-ups easier to align and reduces the risk of small measurement errors becoming a larger traffic-flow problem.
4. Climate and traffic considerations
Weather affects how pavement-marking paint spreads, adheres, and dries. Plan line striping for dry conditions and moderate temperatures rather than humid, rainy, snowy, or icy weather. Moisture can interfere with application and contribute to premature fading or repainting. Check the forecast and pavement before setup, and postpone painting if rain or dampness threatens the work area.
Temperature matters on asphalt, too. Peak summer heat can soften pavement, making it a poor time for parking-lot painting. Spring or early fall often offers more reliable scheduling conditions, but assess the actual surface and weather on the workday. Direct sun, shade, and changing temperatures can affect different sections of the same lot.
Match the marking material to the pavement, local climate, and traffic pattern. A busy truck route faces different wear from a lightly used parking row. Traffic volume, turning, braking, and weather exposure all influence how quickly lines wear. Select paint suited to the surface and expected use; unsuitable material may fade, crack, or deteriorate early.
How long should pavement-marking paint dry before traffic returns? Keep vehicles and pedestrians off the markings until the paint has dried according to its product instructions. Temperature, humidity, airflow, and coat thickness affect drying, so reopening time depends on those conditions. Use barriers to protect wet lines, and reopen the area only when tires won’t track paint or damage the markings.
Sequence pavement work carefully. If sealcoating is planned, schedule it before striping so paint can adhere to the prepared surface. Restore markings affected by pavement repairs promptly. In high-traffic parking lots, inspect lines regularly and plan touch-ups based on wear and environmental stress. Faded arrows or stall boundaries can make circulation less clear, especially where vehicles merge or turn.
Use a site-specific checklist before crews begin:
- Check the pavement and forecast for moisture, rain, snow, or ice.
- Choose a moderate-temperature work window, avoiding peak summer heat.
- Match the marking material to the pavement, weather exposure, and traffic.
- Block off painted areas until markings have dried according to product instructions.
- Inspect high-wear routes and repaint faded or repaired sections promptly.
These checks help align application conditions with the demands of the site. If traffic exposure or weather makes scheduling difficult, discuss your striping project and timing before work begins.
StripeGuys Warhouse Line Striping: Warehouse Floor Striping
StripeGuys provides warehouse line striping to turn a planned floor layout into clear, functional markings. For warehouses that need defined work zones, travel paths, or safety markings, Warehouse Floor Striping provides visual guidance for daily operations.
Turn to StripeGuys when a warehouse needs new lines, epoxy line painting, or removal of existing markings before a revised layout. Removing outdated lines helps prepare for a marking plan that reflects current facility use. For parking areas, Parking Lot Striping defines stalls and vehicle routes.
Share the areas that need marking or removal and how the space is used. Contact StripeGuys Warhouse Line Striping to discuss your striping project.
Put Your Next Striping Project on a Clear Plan
Before changing a layout, decide who will coordinate the markings, surface work, and operational requirements. A clear project brief helps align the finished lines with how people and vehicles use the space. It also gives your team a practical reference for future changes, rather than relying on memory when markings need attention.
Common striping application errors are easier to prevent when layout decisions and execution are handled as one coordinated task. StripeGuys provides Warehouse Floor Striping, Epoxy Line Painting, and Parking Lot Striping. Request a free quote when your facility needs new markings or your parking lot needs a defined striping plan.
Share the areas involved and the outcome your operation needs. Contact StripeGuys Warhouse Line Striping to discuss the next step. A well-planned project can give your team clearer routes and a more functional space.
Frequently Asked Questions
What are the most common parking lot line striping application errors?
Common striping application errors include inaccurate line placement, overspray, inconsistent paint coverage, and applying markings to contaminated pavement. A typical example is a stall line that drifts toward the drive aisle, reducing usable space and confusing drivers. Problems can also arise when the selected paint or equipment doesn’t suit the pavement and site conditions. Inspect the finished pattern from a driver’s approach, not only from beside the stripe.
What causes paint to peel, fade, or wear off after striping?
Paint can peel or fade if it doesn’t bond properly or the marking faces conditions it can’t withstand. Oil, dust, moisture, weak pavement, unsuitable material, and severe weather can all contribute. Traffic also wears lines unevenly: turning and braking areas often face more stress than straight, lightly used sections. Compare wear patterns across the lot. Isolated wear may point to a local surface issue, while widespread fading may indicate a broader application or material problem.
How do surface preparation and cleaning affect line striping results?
Preparation gives paint a clean, stable surface to bond with. Residue from a vehicle leak, loose aggregate, or remnants of an old marking can interfere even when pavement looks clear from a distance. Inspect the entire stripe path closely, including places where vehicles stop or turn. If the surface feels damp or contamination remains after cleaning, delay application until the problem is addressed. This reduces the risk of adhesion problems appearing only after the area returns to use.
How can incorrect striping layout, measurements, or line widths be prevented?
Prevent layout errors by treating the site plan as a working reference, not a rough sketch. Identify fixed features such as entrances, loading areas, and pedestrian routes, then compare proposed lines with actual pavement measurements. For example, a row that fits on paper may conflict with a loading path on site. Use temporary marks to review the pattern with the property owner before painting, and keep the approved layout for future repairs or changes.
How do oil, moisture, old paint, and pavement condition affect paint adhesion?
Oil can form a barrier between paint and pavement, while moisture can disrupt bonding during application. Loose or failing old paint gives a new coat an unstable base, and deteriorated pavement may not hold markings consistently. Fresh asphalt also requires suitable paint selection because some materials can discolor or adhere poorly. Inspect each affected area separately: a stained patch, damp low spot, or peeling stripe may need different preparation before repainting.
How can contractors inspect and correct striping application errors?
Inspect the work in stages: review the layout before painting, watch the first application pass, then walk the finished area from vehicle and pedestrian approaches. Look for drift, overspray, thin coverage, missed sections, and markings that conflict with site flow. Photograph problem areas and note their locations to help distinguish layout issues from surface or equipment problems. Correct the cause before repainting, or the same defect may return on the new line.